#
SDLink Discord Bot Setup
#
Enable Developer Mode
Although optional, it helps to enable "developer mode" before you add a bot
Go to your Discord Settings
Scroll through the side panel and select "Advanced" in the App Settings section
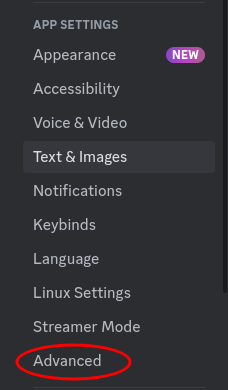
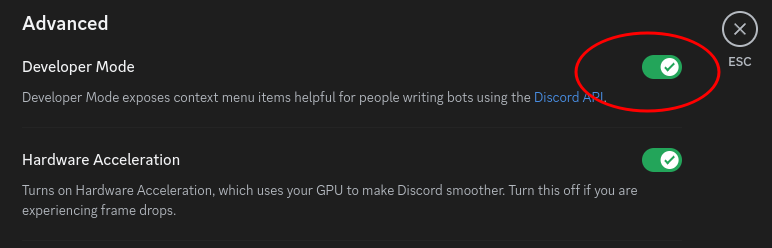
Toggle Developer Mode
#
Creating the Bot
Go to https://discord.com/developers
Select "New Application" in the top right

Give it a name, Agree to the Discord EULA, and click "Create"

Naming Convention
Even though it will let you, Don't put "Discord" in the name of the application, or you're gonna have a bad time. The Bot can't have "Discord" in the name, and it uses the Application name as the default bot name.
#
Configuring the Bot (Bot Section)
#
Build-A-Bot
In the Build-A-Bot Section click "Reset Token" to generate a private token. This is how SDLink knows which bot to send the commands to. Make a note of the token. once you leave this page, you won't be able to see it and will have to reset it again.

DO NOT SHARE THE BOT TOKEN
It's important that you don't share this bot token with anyone. It is essentially the password for your bot. If the token is leaked anyone can use it for their own program and will have access to your Discord server. This token will also be encrypted in the config file after you launch the server for the first time
#
Authorization Flow
Disable the "PUBLIC BOT" flag. This will ensure that only YOU can add the bot to a server

#
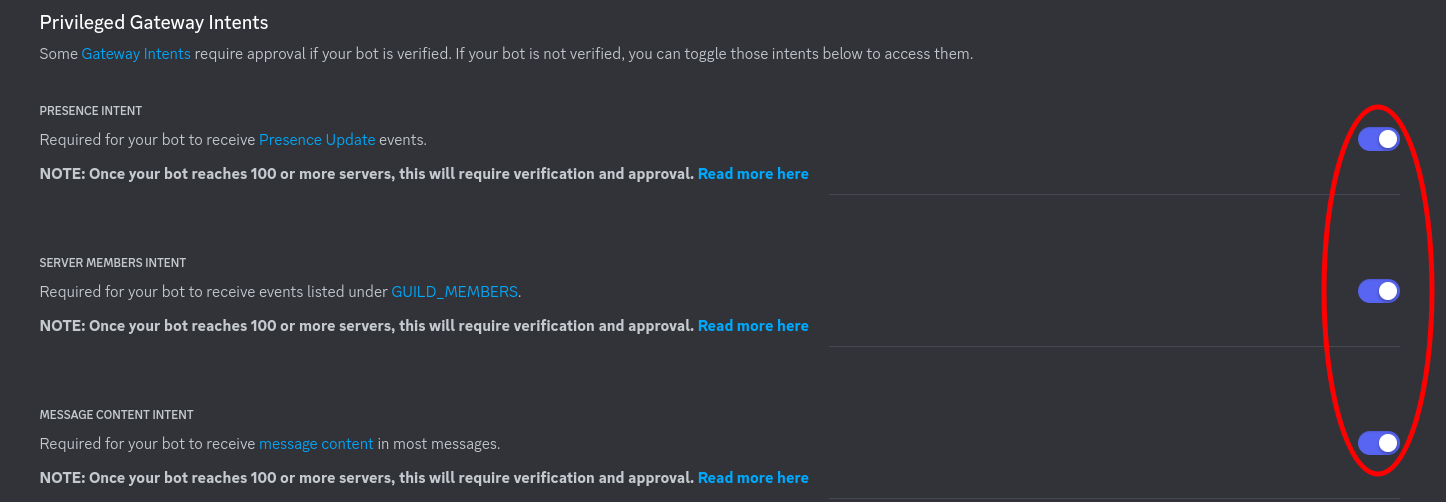
Privileged Gateway Intents
Ensure all options in "Privileged Gateway Intents" are checked. These are needed for the bot to function.
#
OAuth2 URL Generator
Go to "OAuth2" >> "URL Generator" on the side panel

Select "applications.commands" and "bot" in the SCOPES section.

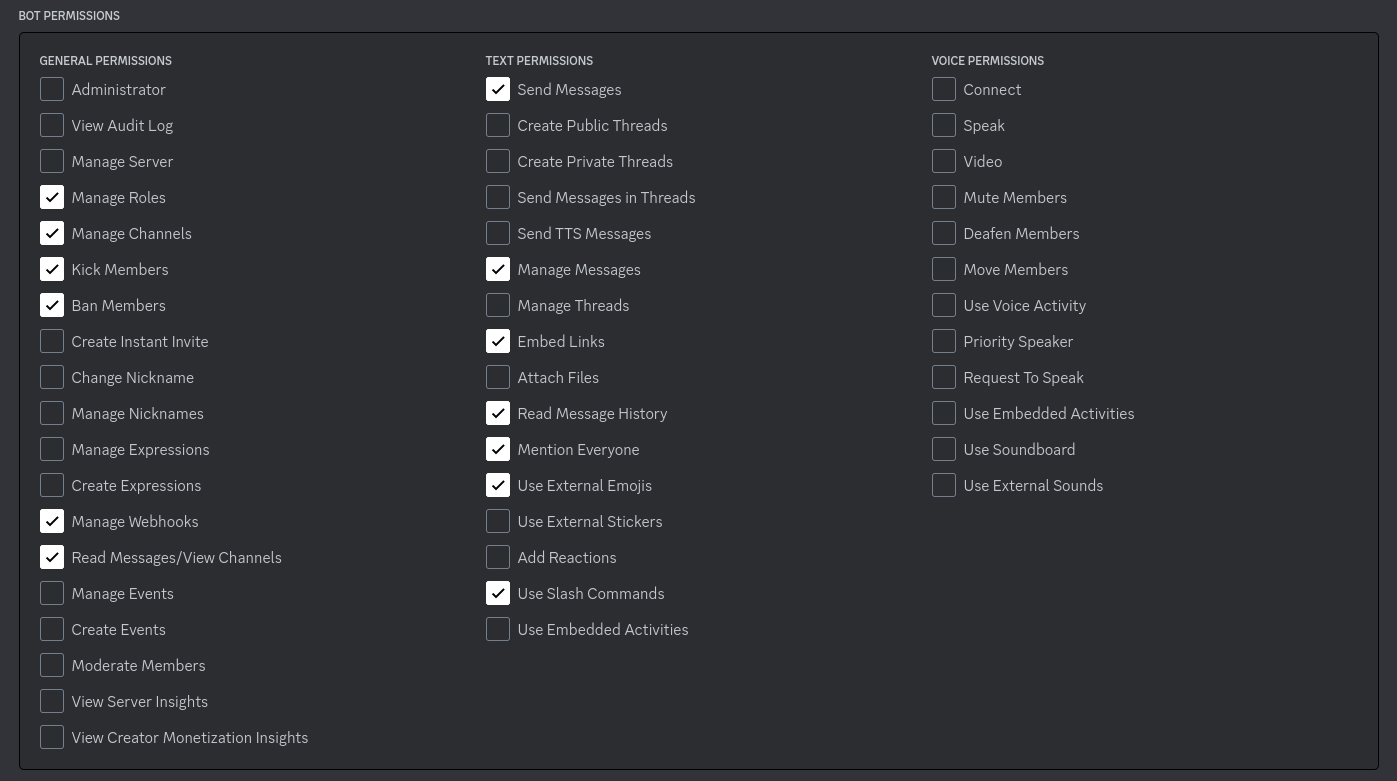
In the BOT PERMISSIONS section, enable the following:
- Manage Channels
- Manage Webhooks
- Read Messages/View Channels
- Send Messages
- Manage Messages
- Embed Links
- Read Message History
- Use External Emojis
- Use Slash Commands
Optionally you can enable:
- Manage Roles
- Ban Members
- Mention Everyone
For more details on what each permission does: see SDLink Permissions Explained
Use the GENERATED URL at the bottom of the page to invite the bot to your discord channel
Pre-Configured URL
At first launch of the Minecraft server (after adding the bot token to the config) sdlink will generate an invite link and display it at the top of the console logs. This will have all the necessary permissions needed for the bot to function at full capacity